Utilizing Facebook Messenger allows you to chat directly with users on your site via Facebook’s messaging platform.
Since this service interacts with Facebook’s data, proper GDPR compliance and cookie management are essential.
Here’s how to achieve a GDPR-compliant installation of Facebook Messenger using the My Agile Privacy WordPress plugin.
Solution 1 – Automatic Scan
You can use the advanced "Cookie Shield" feature to automatically detect the Facebook Messenger integration.
Simply set the Shield to "Learning" mode and browse through your site’s pages; the plugin will handle the configuration for you.
Alternatively, you can opt for manual configuration if preferred.
Solution 2 – Manual Configuration
Part 1 – The Facebook Messenger Code
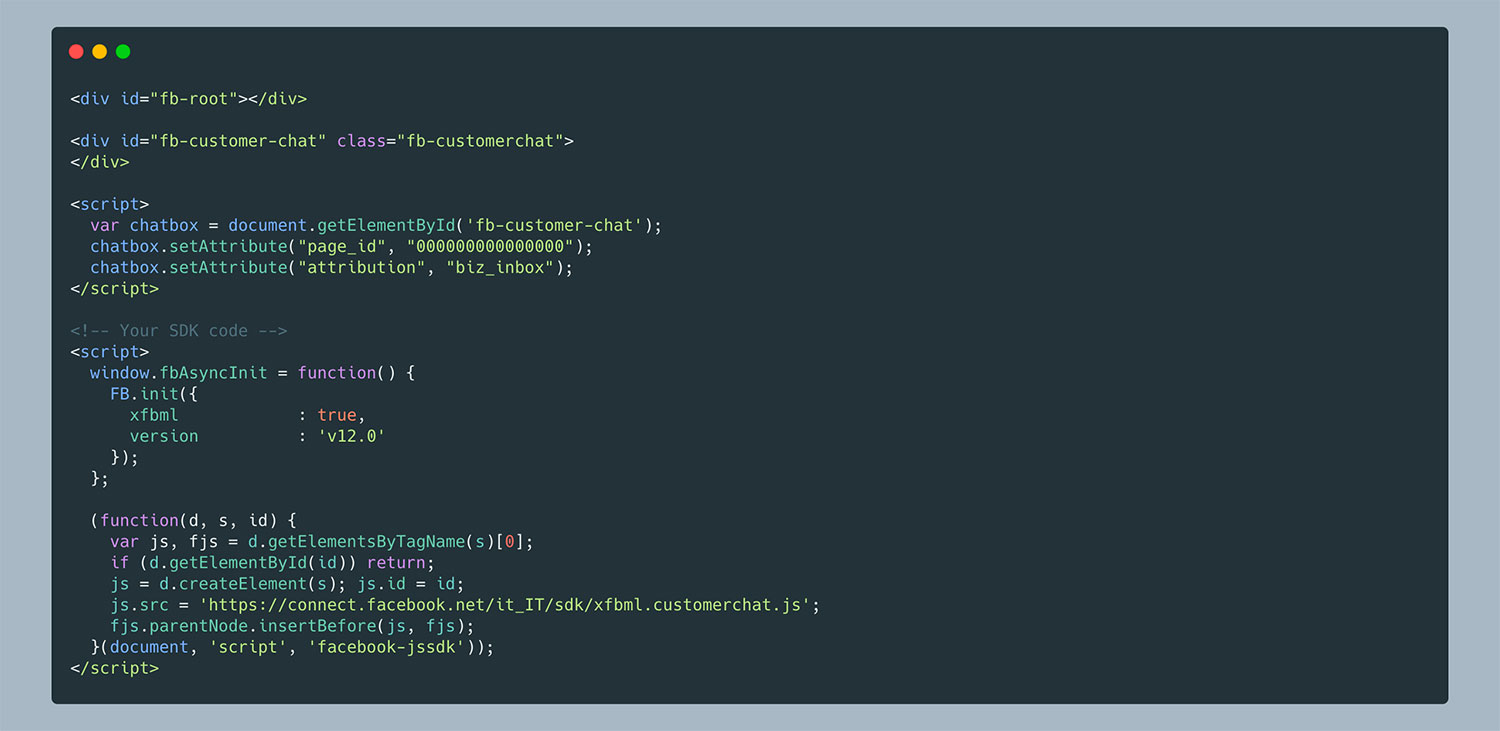
Facebook provides the code to embed the chat on your website. In your Facebook page settings, locate the configuration wizard.
The code will look similar to this:
Part 2 – Adding the Facebook Messenger Cookie in My Agile Privacy
In your WordPress admin panel, go to My Agile Privacy → Cookie List.
Here, you’ll see a list of cookies imported during plugin installation. Initially, these cookies appear in draft status. You should publish only the cookies relevant to your site.

On this screen, you’ll see columns such as:
- Cookie Name: the name of the cookie.
- Is Necessary: indicates whether the cookie is essential to site functionality. If not accepting the cookie makes the site unusable, it is classified as essential; this is pre-filled in the details.
- Auto Update: shows if the cookie’s reference text will be automatically updated to remain compliant with GDPR. If set to "yes", updates occur automatically.
- Installation Type: the method for including the cookie. This may vary according to your implementation needs and will be explained in the guides.
To add the Facebook Messenger cookie, search for "Facebook Messenger Chat (Facebook Inc.)" and click on it.
The detail page features pre-filled informational text along with two blank fields for entering code.
This text is included in your cookie policy and, with "Allow Automatic Update" enabled, will stay current and compliant automatically.
Below, you’ll find an option to select the "Type of Installation" (Javascript and Noscript, or Raw).
Choose "Raw Code" from the dropdown to display the "raw html code" field.
Part 3 – Entering the Activation Code
Copy the code provided by Facebook and paste it into the "Html Raw Code" field.

Remember to save and publish the cookie by clicking the blue "Publish" button in the upper right corner.
Final Step – Verifying Operation
To confirm that Facebook Messenger is installed correctly, load any page where the Messenger code is active. You’ll notice that the chat does not appear until user consent for cookies is provided. This happens when the user clicks "I agree" on the cookie consent bar or enables the cookie from the "Customize" menu.


