The LinkedIn Pixel allows you to track user behavior such as page views and conversions on your website, transmitting this data to LinkedIn. With the data collected, you can create custom audiences, run remarketing campaigns, and refine your campaign targeting.
Because these activities fall under regulations like GDPR and the cookie law, you must obtain explicit user consent.
In this article, you'll learn how to ensure GDPR compliance for the LinkedIn Pixel using the My Agile Privacy® WordPress plugin. Here’s how to proceed:
Solution 1 – Automatic Scan
You can use the advanced "Cookie Shield" feature to automatically detect the LinkedIn Pixel.
Set the Shield to "Learning" mode and browse the pages of your site—your privacy-compliant configuration will be ready automatically.
Manual configuration is also available if you prefer.
Solution 2 – Manual Configuration
Part 1 – Get Your LinkedIn Pixel Code
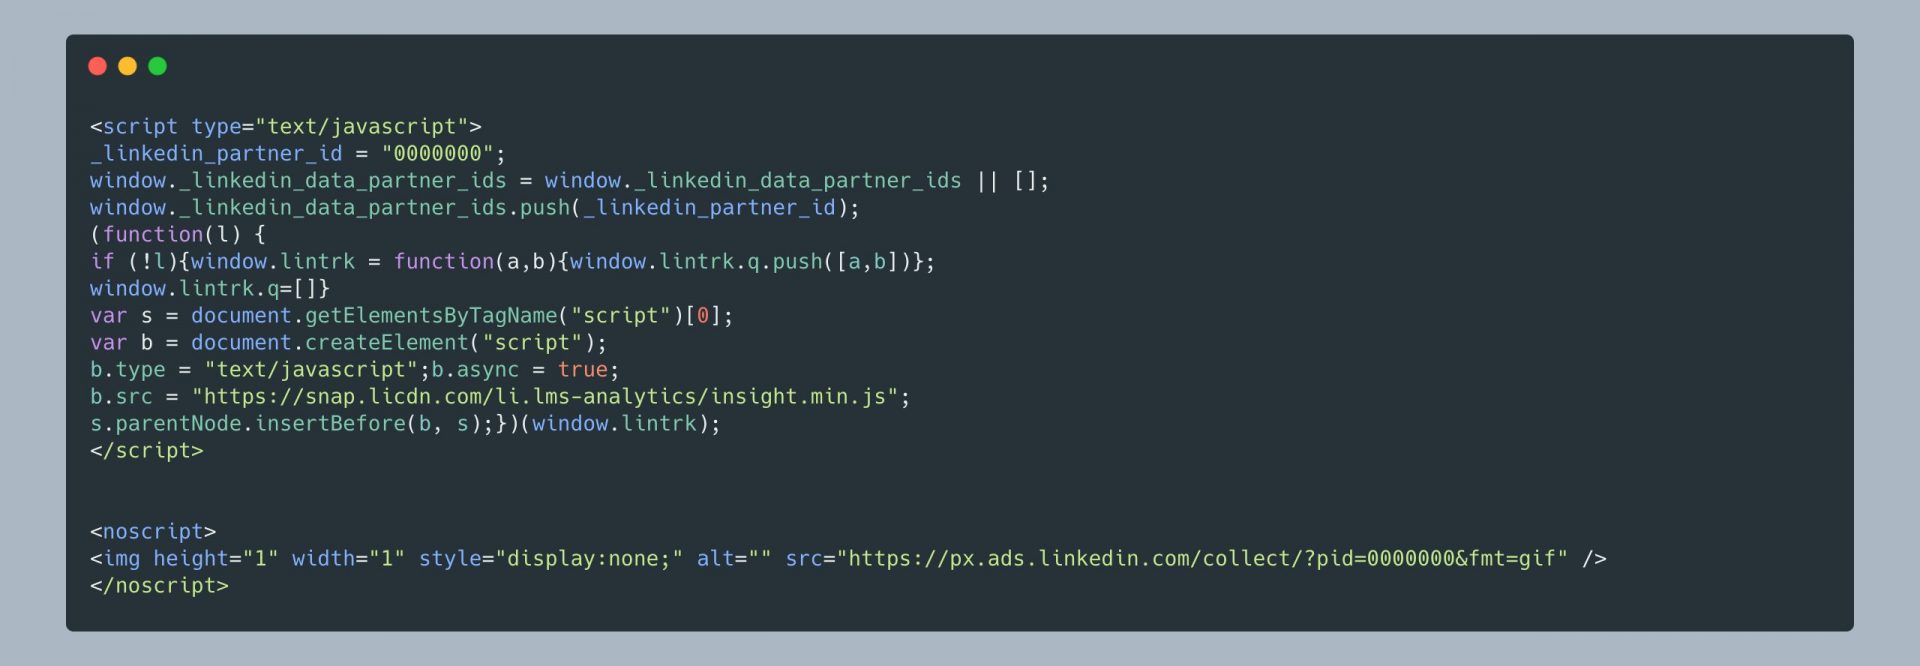
First, locate the LinkedIn Pixel code you want to install on your website.
It will look similar to this:

Part 2 – Add the LinkedIn Pixel Cookie in My Agile Privacy®
In your WordPress admin panel, go to My Agile Privacy® → Cookie List from the left menu.
Here you'll see a list of cookies imported during plugin installation. By default, all cookies are in draft status—publish only those relevant to your website.

The Cookie List displays columns for:
- Cookie Name: The name of the cookie
- Is Necessary: Indicates whether the cookie is essential for navigation. If disabling the cookie breaks your site, it's marked as essential. This is pre-filled in the details.
- Auto Update: Shows if the cookie reference text is auto-updated for GDPR compliance. If set to "yes," the plugin updates the texts automatically.
- Tails: Shows a preview of the code associated with each cookie—helpful for integrations like LinkedIn Pixel.
To add the LinkedIn Pixel, look for "LinkedIn Ads" in the list and click on it.
The detail page shows pre-filled informational text and two empty fields where the code can be inserted.
This text will appear in your cookie policy and, if "Allow Automatic Update" is enabled, will stay up to date automatically.
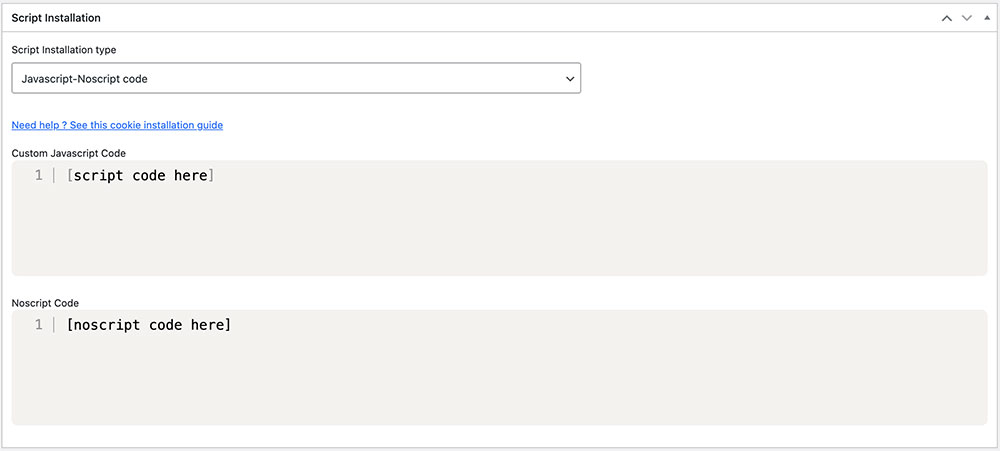
Below, choose the "Type of Installation" (Javascript and Noscript, or Raw). Keep "Javascript-noscript code" selected; you'll then see two input fields:
- Javascript Activation Code – paste the main LinkedIn Pixel code here
- NoScript code – enter the NoScript code if required

Part 3 – Enter the LinkedIn Pixel Code
Copy the LinkedIn Pixel code you previously obtained and paste it into the appropriate fields (as shown above).
Important: Do not include the <script> and </script> tags or the <noscript> and </noscript> tags when entering the code.
Remember to save and publish the cookie by pressing the blue "Publish" button in the upper right corner.
Final Step – Verifying Operation
To confirm proper installation, you can use tools provided by LinkedIn or Google to check the Pixel, or contact support if you need help.
When browsing any page on your website, you'll see that the LinkedIn Pixel remains inactive until the user explicitly consents to cookie installation.
Consent can be granted by clicking "I agree" on the cookie acceptance bar or by enabling the LinkedIn cookie in the "Customize" section.


